
Tired 1990's RV ~ To Mountain Chic
- Becky McFarland Cox
- Feb 10, 2022
- 6 min read
Updated: Feb 11, 2022


One very cold October night in our 1976 Starcraft pop up camper turned out to be our last trip in the pop up. Our family had so much fun camping in our pop up, that had been in deep storage for the previous 5 years. That weekend the low was 36 in the midwest. In a pop up as old this we were cold! The only thing that saved us besides sleeping in our puffer coats was the small heater we brought.
It was the last trip for the pop up and it became the inspiration for the RV reno.
We have a few things to think about when purchasing our RV.
It needed to sleep 5-6 people.
It needed to be modestly priced
Engine in good to great shape
"house" needed to be in decent shape. We knew we wanted to redo the cosmetic condition/esthetic of the interior. We also knew it would cost a decent amount even without a total gut rehab.
We didn't want it to be too long. We know that if your rig is too big, some of the really cool out of the way parks, won't allow certain sizes.

We looked at campers on line for several weeks. You know how it gets when you become laser locked into purchasing something really fun? It becomes obsessive, you learn about things you never thought were even a thing. Originally we were looking at travel trailers. We quickly leaned that our Honda Oddessy was many things but a travel trailer huller was not one of them. I had previously owned an Bambi Airstream, and also owned a truck to pull it. Which means I was fairly familiar with tongue weight and gross vehicular weight.
With our current situation a truck wasn't really in our future. So that was where our journey, and it was a journey, took us.
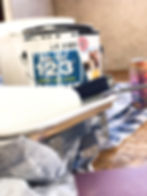
Long story short...we found a 1999 (it was a good year), Damon Day Break 2961, 31 feet long, at a Camping World in Springfield Illinois. It was super funny when we pulled up to the Camping World all excited to see this beast in person. The salesman takes us past all the super cool, state of the art bad ass rigs to the back of the lot. Under a giant American Flag is a super sad, faded girl, with tons of potential, she would soon be ours. Picture below.

As a prop and wardrobe stylist and designer... seeing potential is always two fold. It is both a blessing and a curse. I can't help but redo spaces in my mind....even if I don't have the opportunity to physically redo them.
Bryan, myself, and the kids took on a couple trips before the crazy pandemic winter of 2020 hit. These trips were for fun and also allowed us to live in it long enough to know how we wanted to do the interior. I have to say that I was super focused on the interior and my husband Bryan was focused on not looking like a 'meth lab on wheels'. Yes, we are huge fans of Breaking Bad. However, in real life, didn't appreciate the desert, drug lab, POS esthetic.
We took several images of the interior and exterior beforehand mostly so we could use it for inspiration. I knew it seemed overwhelming however I knew that if we took it bit by bit we could do it!
As soon as spring hit we were able to move it to our friend's import business parking lot! Without that I don't know where we would be. Cheers to Richard!!
First thing we did was take off all the cabinet fronts. We lightly sanded all the fronts and all the bases with sand paper, washed with TSP, and removed all knobs and pulls.


We purchased several tools during this reno. One of the best tools was the paint sprayer. It was the Avanti paint sprayer from Harbor Fright. We set up a spray booth and Bryan sprayed all the cabinet fronts with primer and I hand painted all the cabinets twice with primer. I have seen on several of the blogs that many people cover everything they don't want painted and spray the interior. In retrospect that may have been easier.

We used Behr Marquee for the interior paint along with Zinsser Bulls Eye 1-2-3 as the primer. We read so many blogs that said that it was SUPER important to use a primer. There are so many strange surfaces and finishes. The primer gives you a great base to work from. The last thing I wanted was the paint to peel after countless hours of work.
Bryan took out the old dinette table. We used it as a template. We found a cool butcher block material at Menard's. We used the same hardware and reattached it to the new butcher block table top. With all the white walls, it was important to add some warmth with wood.

In an RV there are only a few solid walls and only a few opportunities for sight lines that could give a WOW factor. This is where the wallpaper comes in. It is also my favorite! Again I researched like crazy because RV's are not houses in regards to weather and wild fluctuations in temperature. That said, adhesives can be tricky territory. I ended up with a really fun pattern printed in PVC from Etsy.

We landed on a groovy modern mountain vibe for this reno. We love being in the mountains and so this is our little piece of the mountains on wheels.

It is technically a peel and stick wallpaper, however I also used a wallpaper paste. This is based on loads of research. Fluctuating temperatures make things hard to stay stuck. So far so good!
The cafe benches and sofa had to be recovered. With kids and dogs I knew we needed some really durable fabric. Sunbrella fabric is the gold standard for this situation. I really didn't want to spend an arm and a leg for the yardage I needed.

I found this really cool black and white (my favorite) reversible indoor/outdoor high preformance fabric at Joann's Fabric.

I choose a gray linen printed high preformance fabric for the sofa, also from Joann's Fabric.
I did a simple reupholstering. I used an electric stapler, fabric scissors & hot glue. I took several photos during this process.

I basically took each piece apart from the frame and wrapped the cushion with the new fabric. I took care to keep fabric level. IT WAS SUPER SATISFYING!

I used T pins to secure the fabric, then followed up with staples. Where staples were not possible I used hot glue.

The kitchen cabinets we painted green. We liked the way the green cabinets differentiated the kitchen from the rest of the rig.
Here are some before and after of in interior of the RV. It is so much for to see the transformation!

Lovely 90's interior before. Notice it is in really good shape. We could see that the RV was lovingly cared for, regardless of the outdated finishes.

We used peel and stick subway tiles. They did need extra glue due to the fluctuations in temperature. We live in Missouri and it gets very cold in the winter and very hot in the summer.


Details are what can really make a project like this extra special. Bryan was able to take some of the rustic wood from the stair renovation to use as panels. He used his new to him C & C router. I absolutely love the way the came out.

Some say God is in the details. I love the details. Bryan created this little header above the RV door. He used his C & C router and I painted the inside of the letters. It makes us smile to see it above the door.


What can I say....the outside was lots of work. We both agree it was worth it. After researching so many blogs and realizing there are so many philosophies on how to paint the exterior of an older RV. We decided to go with DIY car paint. The bid we got to have it painted was 3 times what we paid for the RV.
We settled on Dupli Color .
-We removed all the decals. We used an eraser attachment on our drill, Goo Gone, solvents...different tools worked for different areas.
-CLEAN CLEAN CLEAN. We wiped down the RV with TSP before primer.
-We taped off everything we didn't want painted or removed it.
-PRO tip: Paint in a paint booth whenever possible. Outdoor painting was our only option. While safer, it proved to be quite challenging.
-We primed the out side
-Three coats of white
-Three coats of black
-Two coats of clear coat


Masking with really good painters tape was important. We found this inspiration online. We loved the way the graphic element wrapped around the back of the RV. It took a few extra steps and care to make this happen. I'm so happy we did it!


We are thrilled to have all the hard work behind us. It was 100% worth it. Our RV is a project that we enjoy most of the year. Our kiddos are getting older and this was defiantly a project from the heart. We are loving making memories with our children, friends, family, and pups!